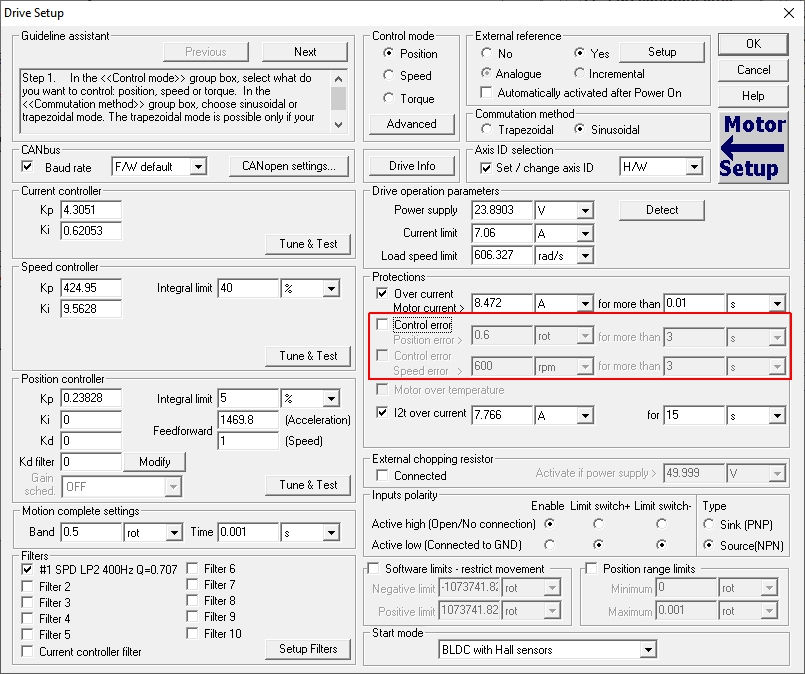
The system performance is based on the controllers tuning which can be performed through the Tune & Test window, that can be open from the Drive Setup dialogue.
The controllers must be tuned in the following order:
- current controller tuning
- speed controller tuning (if active)
- position controller tuning (if active)
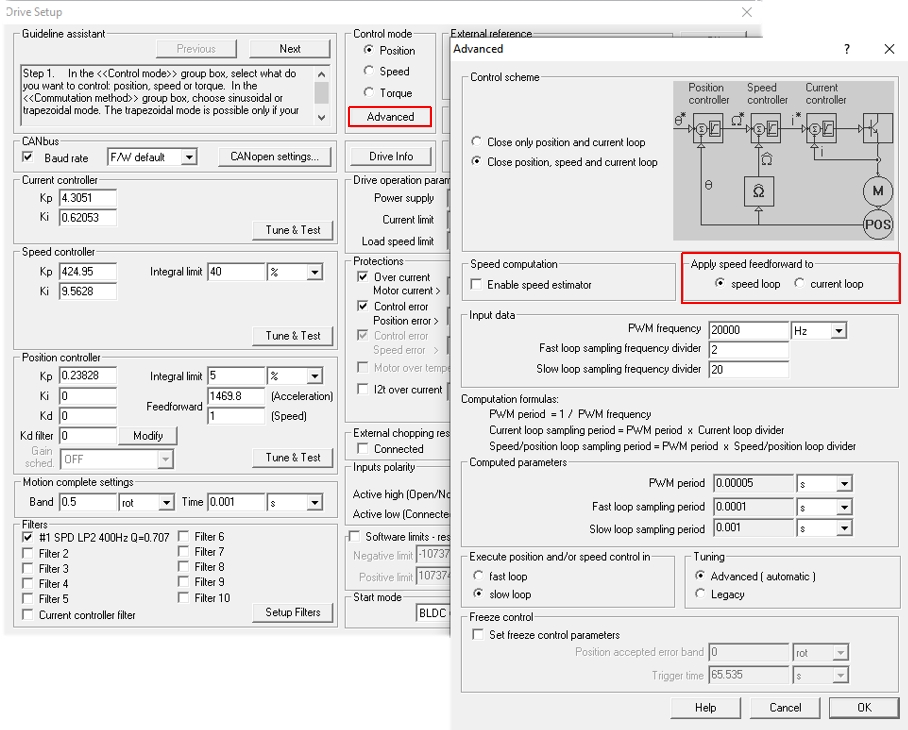
Remark: The active controllers depend on the configuration used and can be selected through the Advanced dialogue.
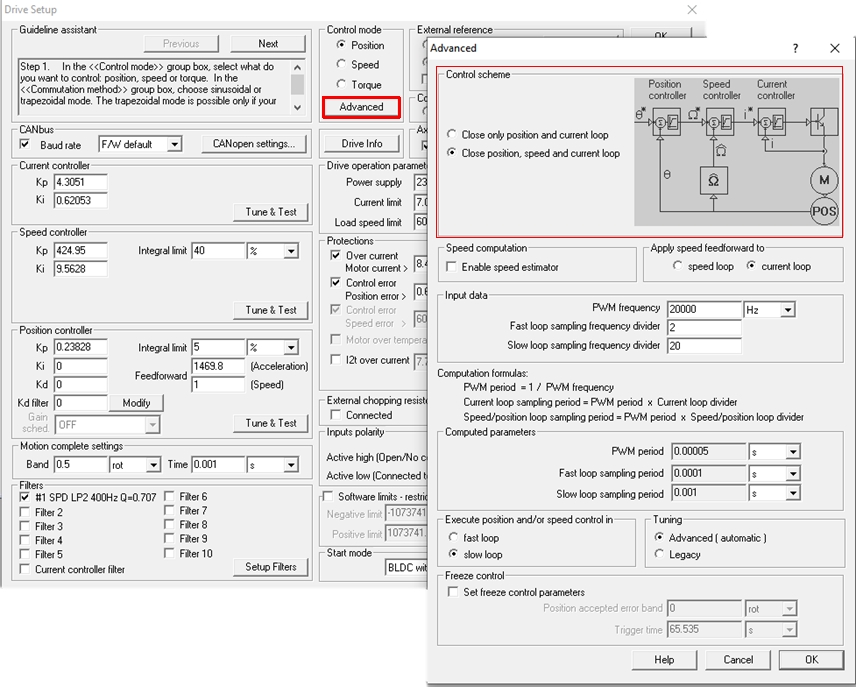
I. Current - Position configuration
Current controller
The first step consists in setting the Test current (equal or close to the motor nominal current) and running the test, to see the controller behavior.
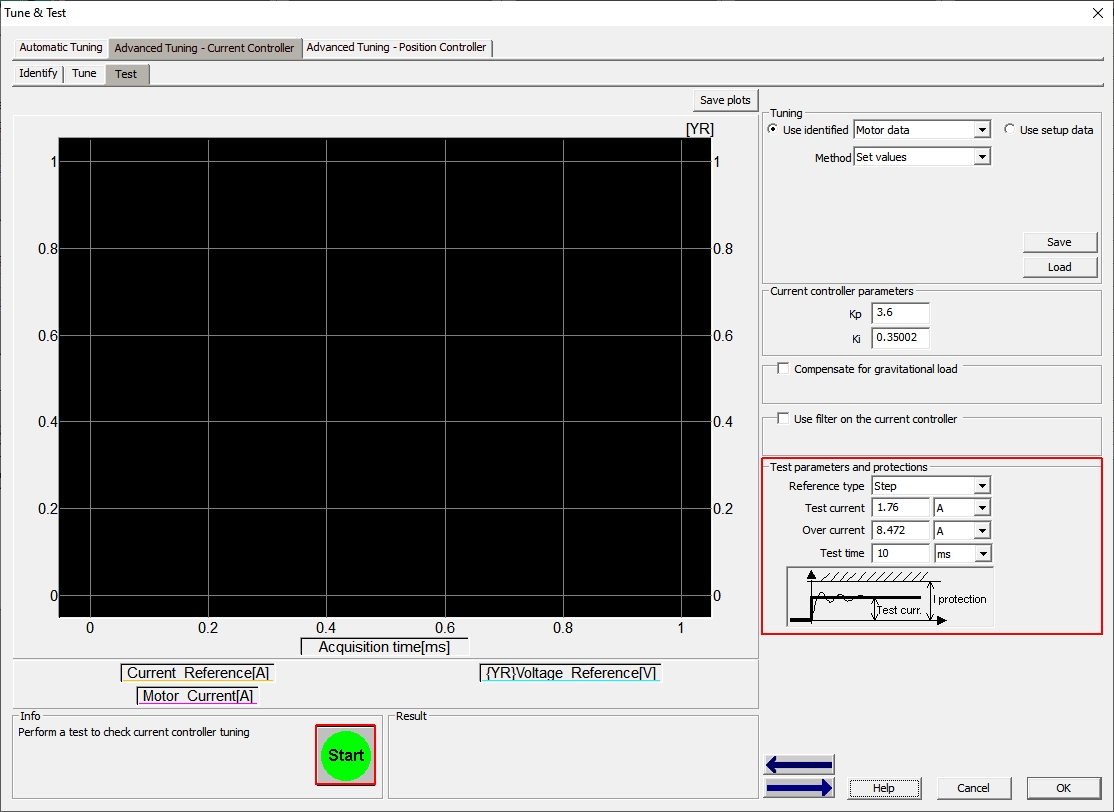
Based on the result, the Kp and Ki parameters can be manually adjusted until the motor current follows the reference, as close as possible.
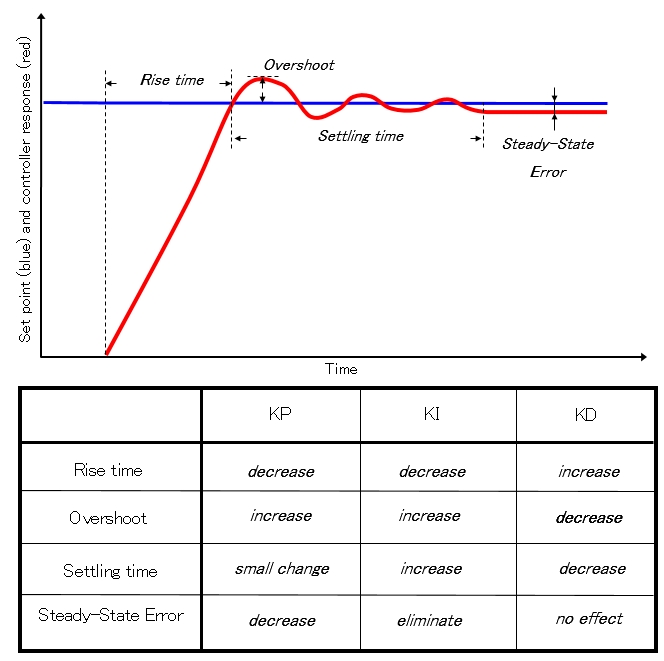
The graph and table below gives the relation between the controller gains (proportional part - Kp and integral part - Ki) and the main control quality indicators: rise time, overshoot, settling time / steady state error
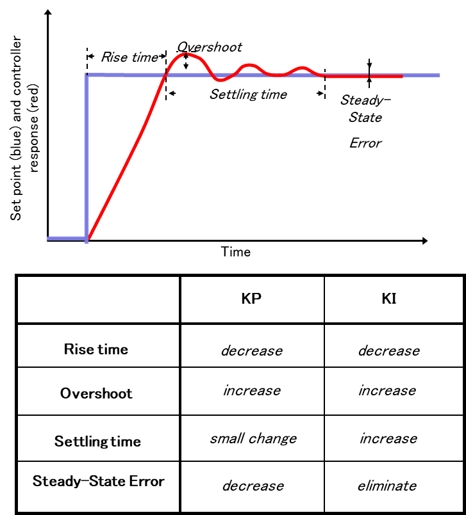
The manual tuning is basically a trial and error process based multiple tests and gains update, based on the results. As a rule of thumb, the proportional gain should be increased until the current reaches the imposed value or vibration/oscillations occurs at which point it should be decreased by about 25%. The same idea applies for the integral gain. The current controller tuning should be made in such a way that the current reaches the reference as fast as possible, even if a small overshoot is present.
In case of a gravitational load, the tuning wizard allows also to set a current offset which will compensate for the gravitational force.

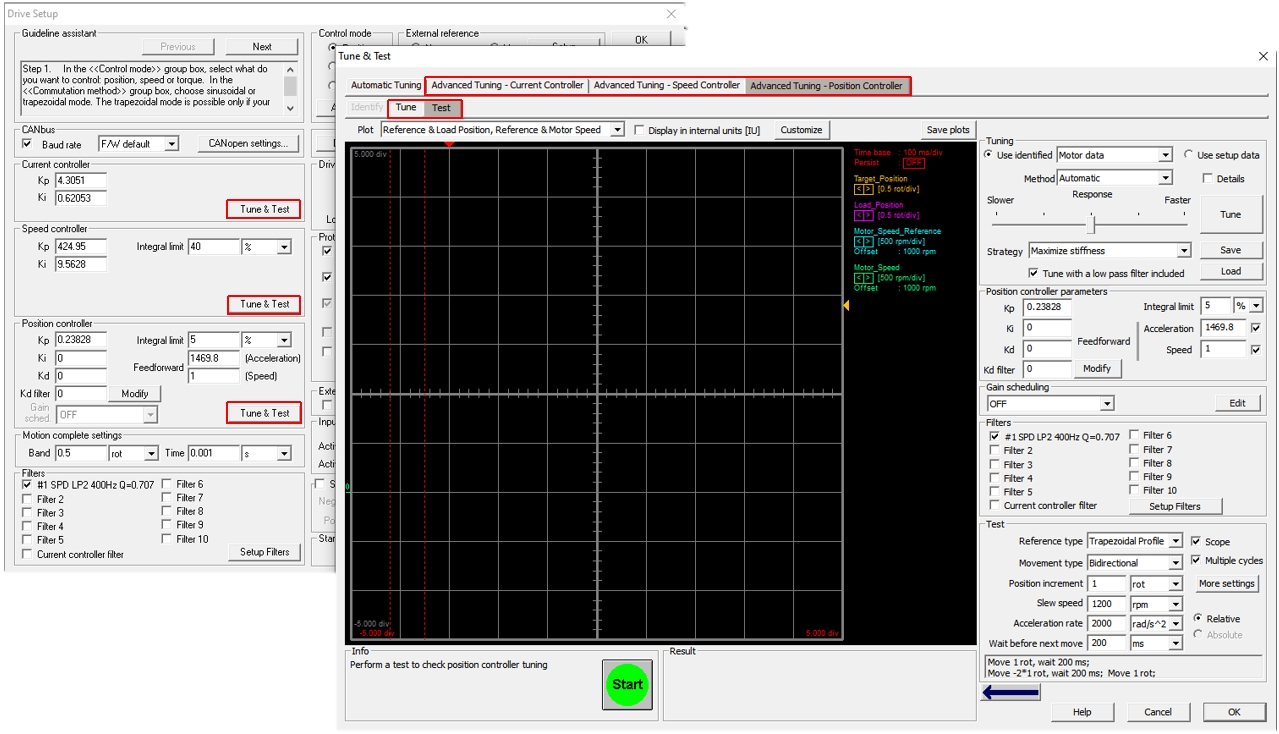
Position controller
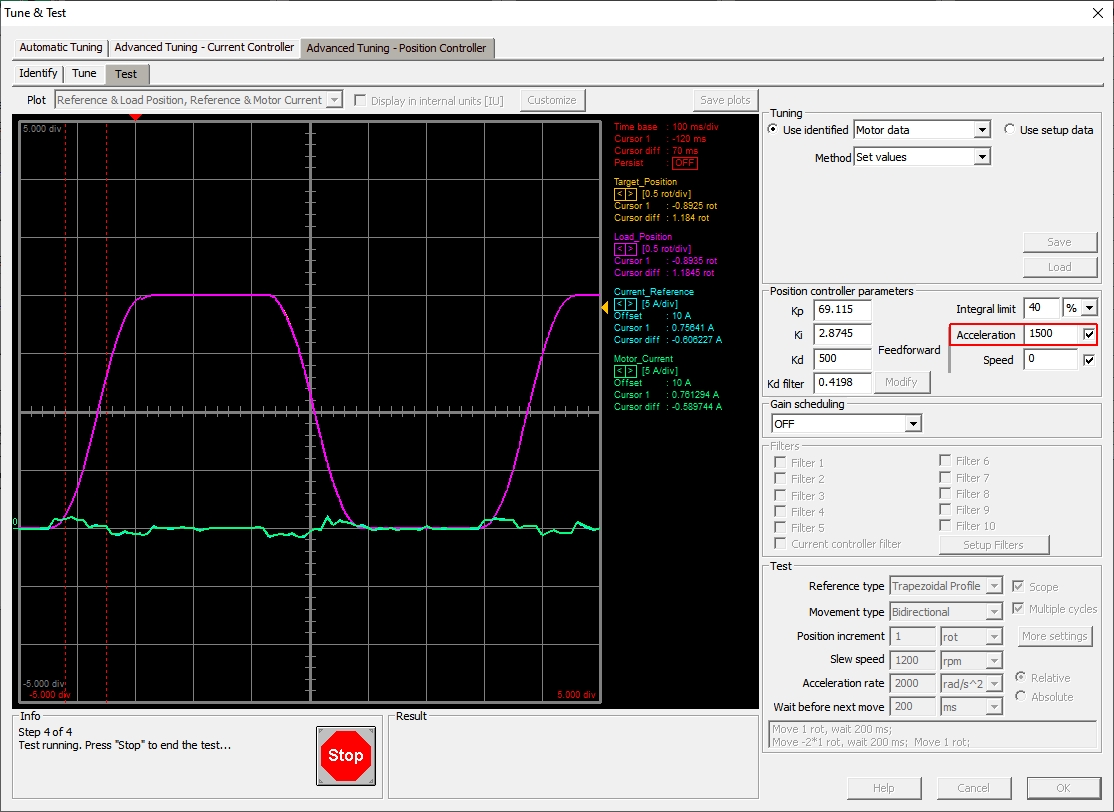
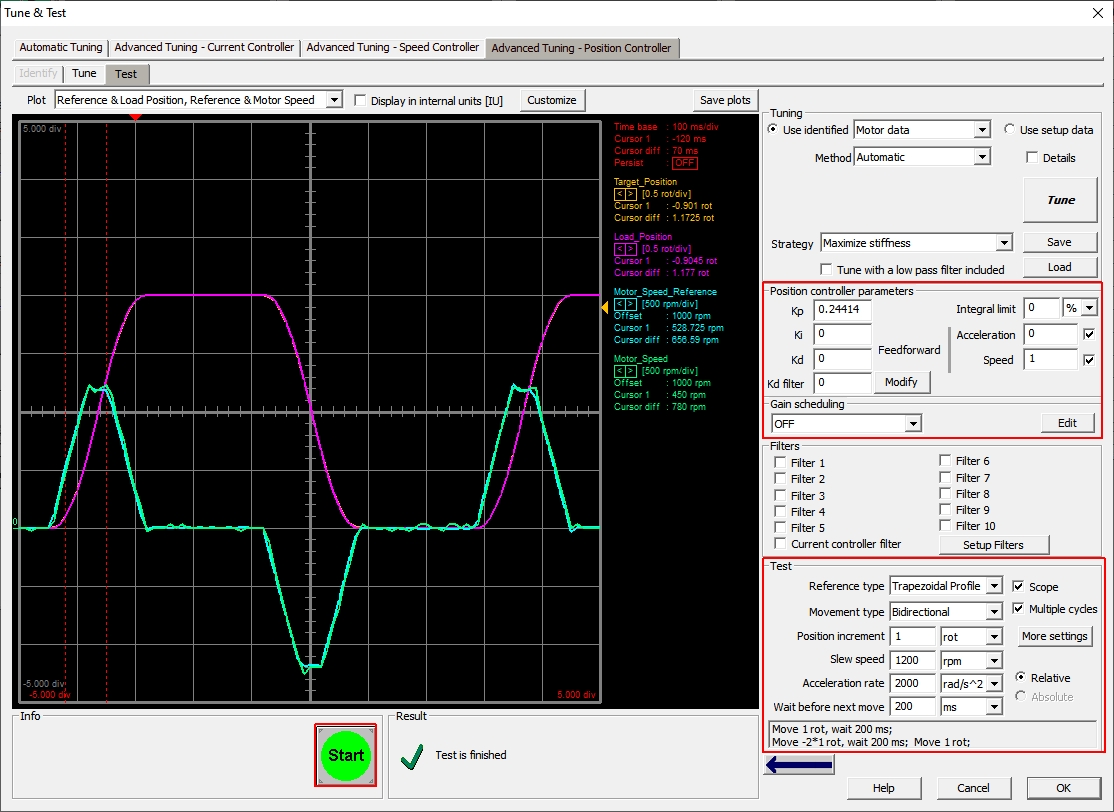
The Test group box in the Advanced Tuning - Position Controller tab allows to set a motion profile like the ones that will be used in the application.
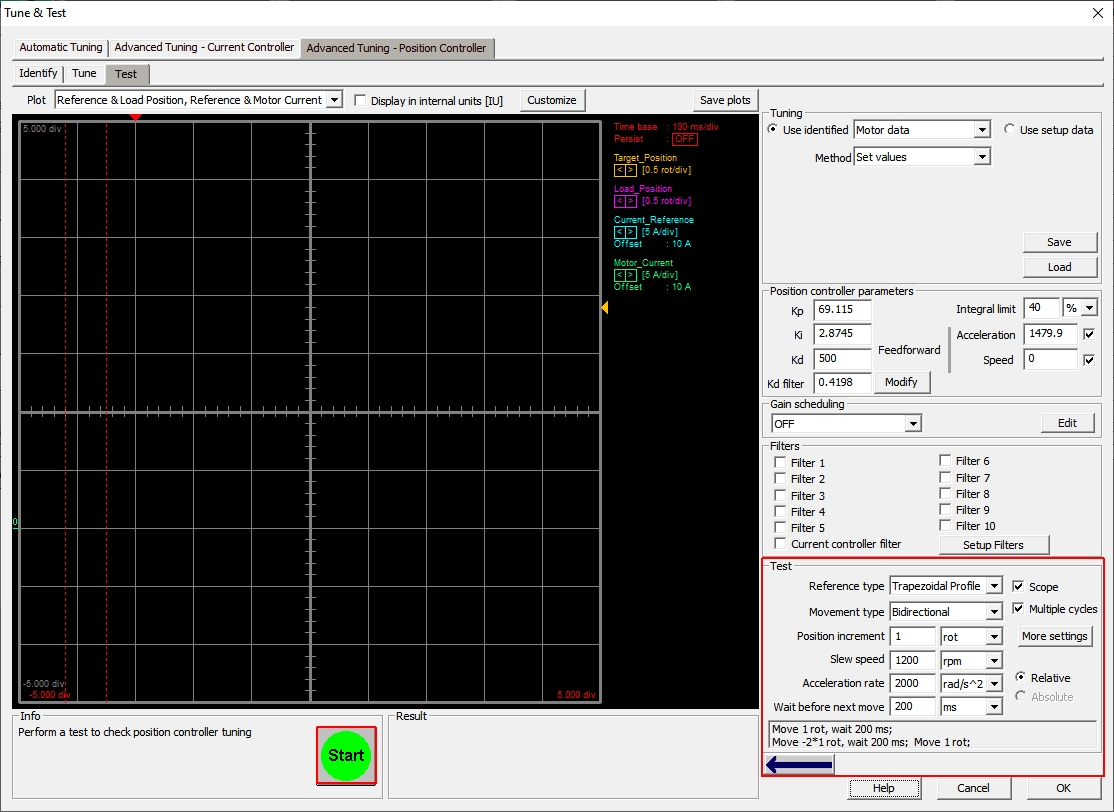
After the test is started, the drive will try to move the load according to the imposed profile.
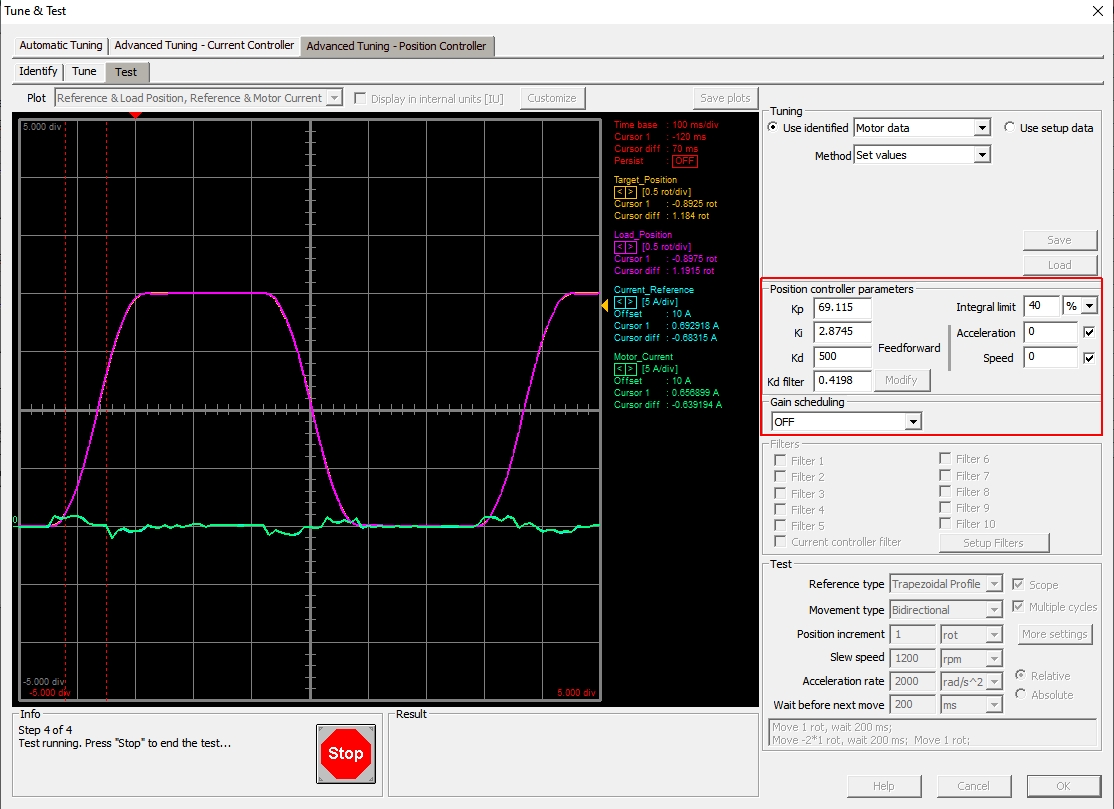
The results will be displayed on the built-in oscilloscope and the test will continue running, allowing the user to modify the tuning parameters on the fly, until stopped by the user.
Remark: Any changes to the gains are applied to the drive, only after clicking in another box or pressing the Enter key.
The position controller is a PID type controller, which is similar to a PI controller, the difference being in the presence of a derivative part which adds stability / stiffness to the system, preventing the rapid changes of the error .
When doing the fine tuning, the user needs to keep in mind the following:
- Increasing Kp will result in increased overshoot but with reduced rise time and steady-state error;
- Increasing Ki will
result in increased overshoot and slightly increased rise time but will
drastically reduce the steady-state error (in an ideal system, where
the output voltage will never saturate, given enough time the Ki will eliminate the
position error);
- Increasing Kd will result in a slight increase of the rise time but will reduce the overshoot (the steady-state error is not affected by Kd).
Remark: When the initial gains are not providing good results and the test fails due to Control Error soon after it is started, the Control Error can be disabled, to allow the user to keep updating the parameters while having the test still running.
In case of really dynamic movements, where the acceleration is rather big and as a result the motor has a rather big following error from the start (which can't be eliminated by increasing the controller gains as this will make the system unstable), an acceleration feed-forward can be added from the Position controllers parameters group box. The value used for the feedforward will be then multiplied with the imposed acceleration and the result (scaled to IU - internal units) will be added to the current reference (which is the output of the speed controller - if active - otherwise the output of the speed controller). The idea behind the feedforward is to avoid having to wait for an error to occur, so that the PID can increase the current reference enough until the motor starts moving, but to already generate a current command from the moment the reference starts. Hence the presence of the feedforward will help the PID which will have to compensate a smaller error (please keep in mind that the feedforward is actually not related to the controllers and even if you set it from the same tuning wizard, its effect is present and constant regardless of the values of the gains of the controller).
The same idea applies also to the speed feed-forward - the value of the feedforward is multiplied with the speed reference and the scaled result is added either to current command or to the speed command (depending on the system configuration or user setting).
Remark: While the purpose of the acceleration / speed feedforward is to help the controllers, setting values too big for these parameters will actually have the adverse effect - it will hinder the controller by creating an unwanted faster movement/response which will in the end increase the error (it is true that without the feedforward the error will be positive - the motor will lag the reference, but if the feedforward is too big the error will be negative - the motor will be leading the reference, so from the controller point of view it will still be an error which will have to be corrected and which will reduce the stability limits of the system).
In case the desired performance can't be achieved regardless of the gain values used (namely when the gains are too high the system is unstable and starts to oscillate / vibrate and when the gains are small enough to prevent this, then the position doesn't follow the reference fast and/or precise enough) there's the Gain scheduling option that can be used to automatically update the controller gains while the movement is ongoing.
One of the possibilities is the Best settling method which is basically splitting the trajectory into 3 main parts and allows you to set different tuning parameters for them: in motion, settling and standing.
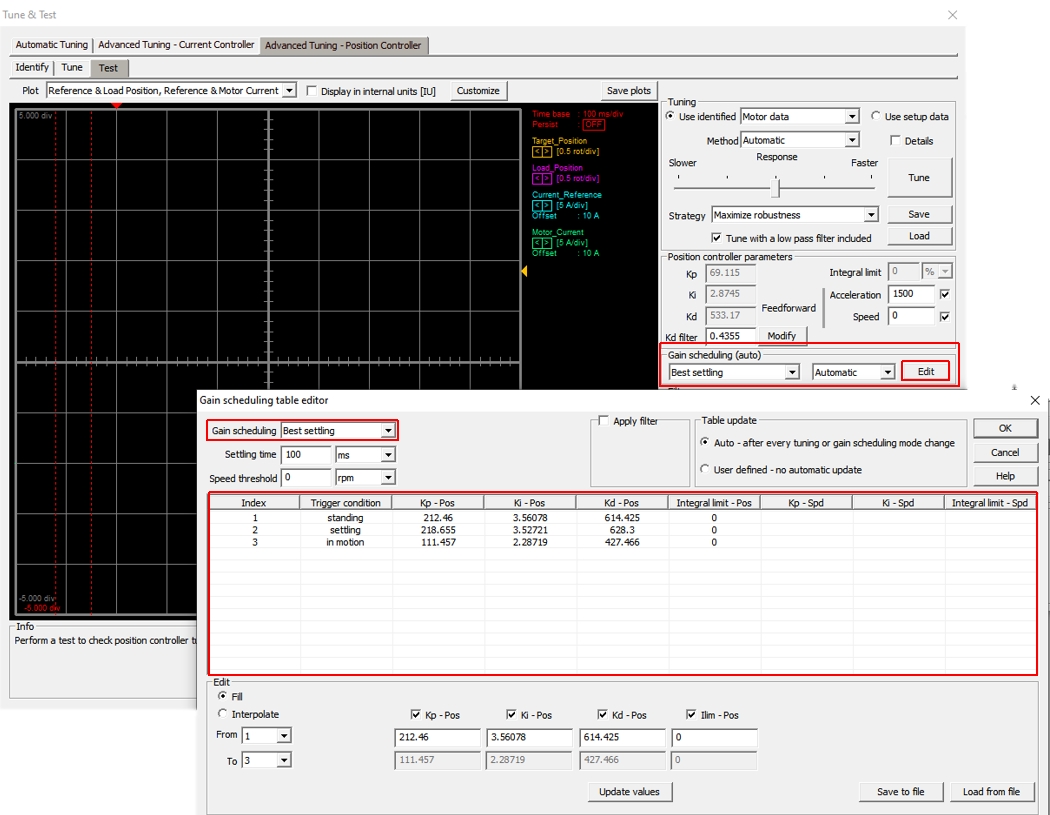
Using this option, one can improve on the typical response of a PID controller - where you are always forced to make a compromise between the rise time, overshoot, steady state error and settling time, by having for example a set of gains which would ensure small rise time (for example a big Kp) while being able to change them before the trajectory ends (which should avoid the overshoot or oscillations that would have been caused by the initial set).
There are also other gain scheduling methods, but they all work in the same way - the user has the possibility to adjust the controllers while the trajectory is ongoing.
The advanced position tuning dialogue includes also a group box with filters which can be activated and used when needed by clicking on the Setup Filters button in the Advanced Tuning- Position Controller | Test tab.
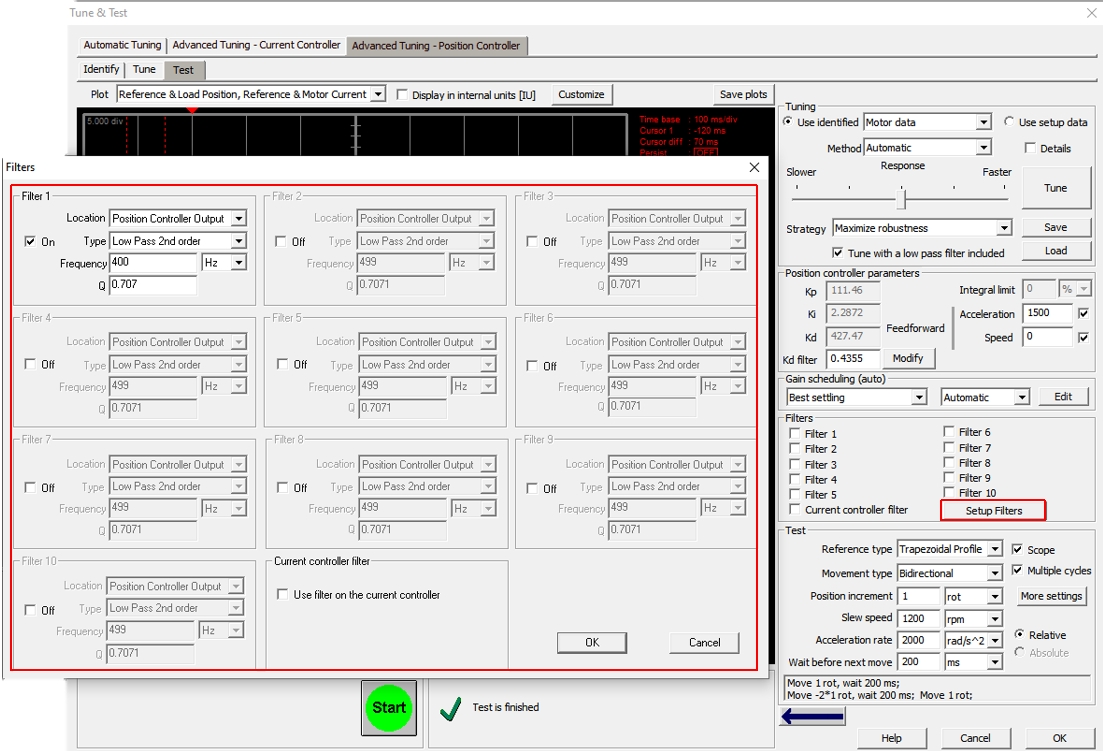
Remark: The Gain scheduling option and the Filters are available only for the dual encoder inputs drives.
II. Current - Speed - Position configuration
In this configuration, it is strongly recommended to set the speed feed-forward to be applied to the speed loop.
Current controller
The current controller will be tuned as is described in the 1st point (I. Current - Position)
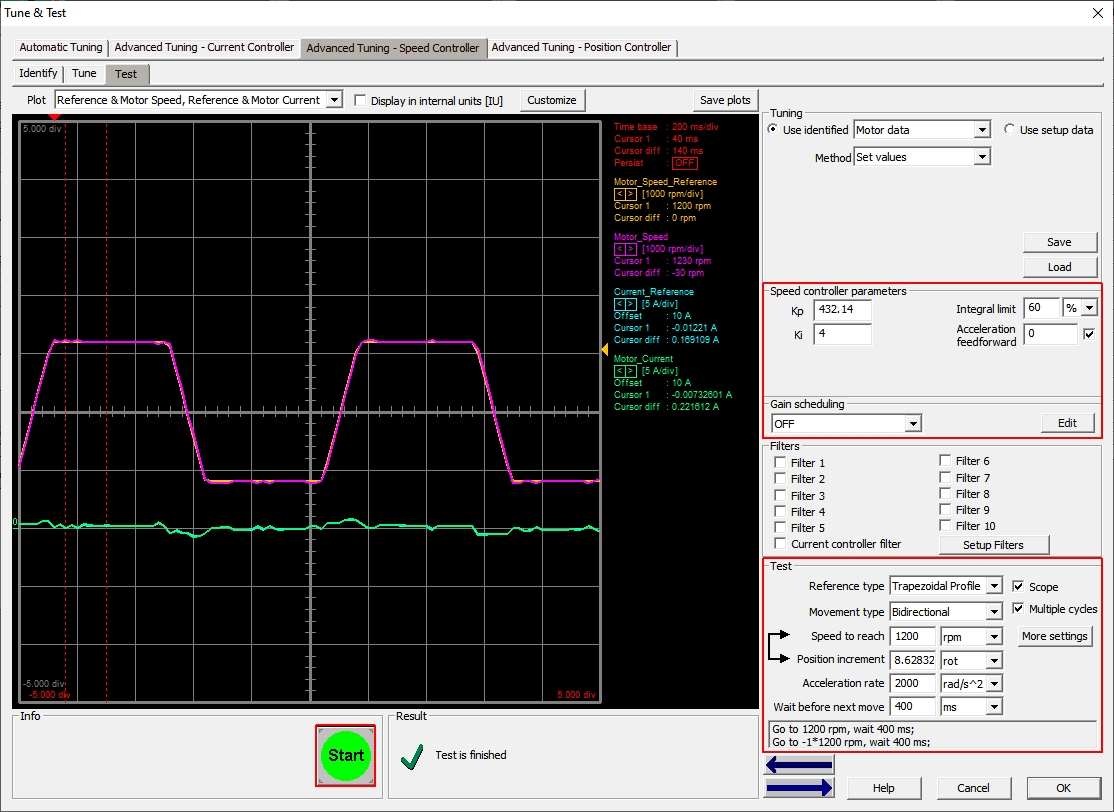
Speed controller
Remark: The speed profile used to test the tuning parameters should be as close as possible to the application requirements, without exceeding the mechanical system limits.
The speed controller is a PI type controller and the tuning can be made as in case of the position controller: the Kp and Ki parameters can be changed while the test is running and the results will be noticed immediately.
Position controller
In this configuration (current - speed - position) the output of the position controller is a speed command (not a current command like before) and hence using a speed feedforward always with a value 1 will have a big positive effect: if the motor is following the speed reference very closely, the position controller job is almost done entirely by the speed feedforward.
In this case only the Kp parameter will be used (and since the IU scaling of the speed is quite different than the current scaling, the Kp values will be rather small for this configuration) to compensate for the small errors of the speed controller, until the motor position will follow the imposed profile.
III. Current - Speed configuration
This option will be selected when the application is about speed control (e.g.: fan, pumps, wheels, cutters, belts, conveyors, optics etc.).
In this case the current controller tuning will be done as in case of the current - position configuration.
The speed loop tuning will be done as presented in the current - speed - position configuration.
 Categories